BrandyF
Moderator


Posts : 351
Join date : 2012-04-18
Location : Jacksonville, Florida
 |  Subject: Toy Tutorial - Flower Blossom Subject: Toy Tutorial - Flower Blossom  Thu Aug 09, 2012 5:34 pm Thu Aug 09, 2012 5:34 pm | |
| - Rchurch wrote:
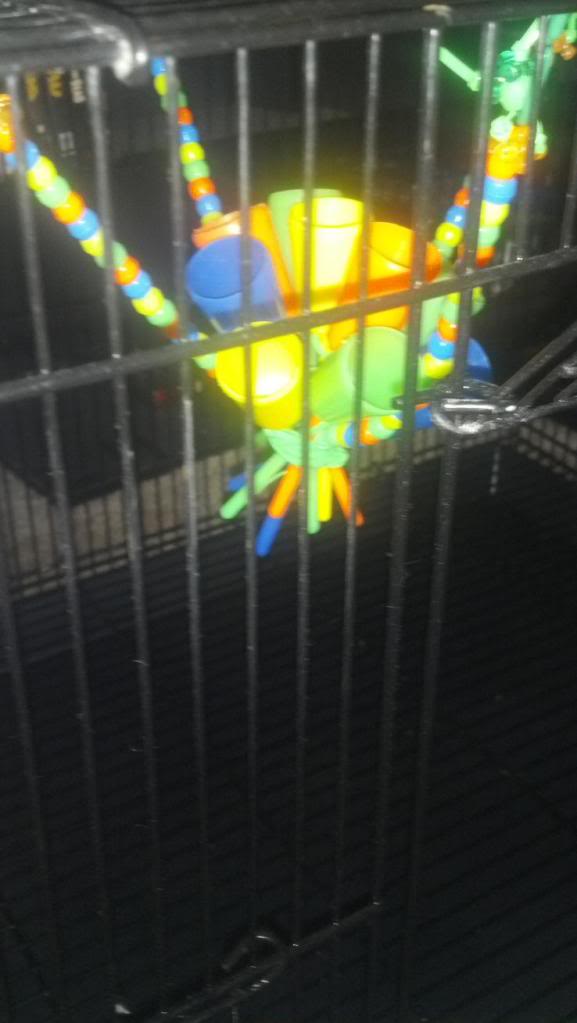
- This is what we call the "Flower Blossom" Toy in our Household, though I suppose it rather resembles a Honeycomb, more. But whatever you want to call it, here it is, with our lovely model, Catwoman, demonstrating its use!
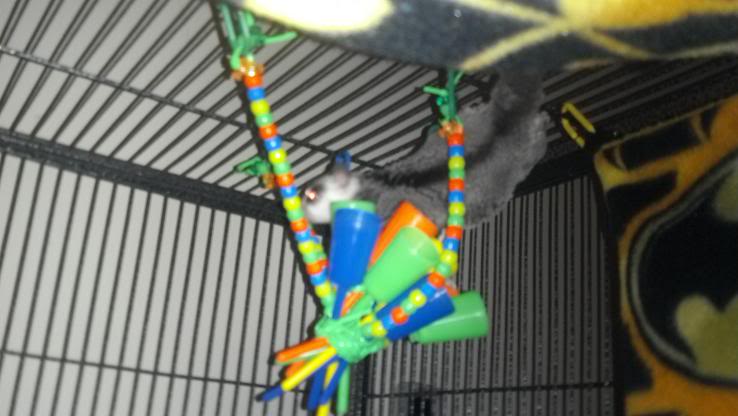
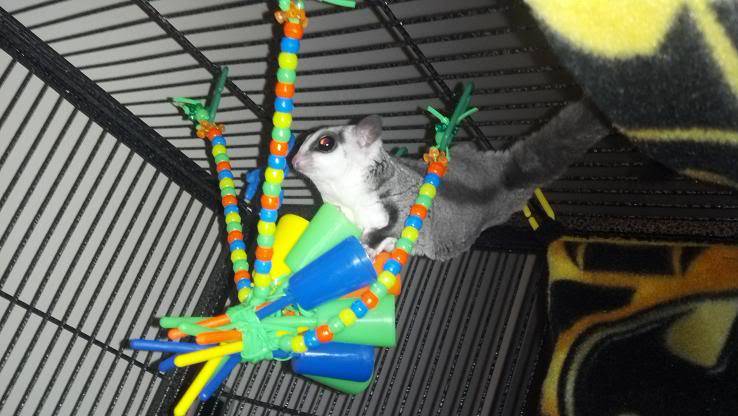
As you can see, it WILL tip over, so when you put in your treats, I would only do a few at first. At least until they learn how to properly get it out. Which of course, is going to force them to go upside down and forage. WORK those muscles, baby! Yeah!

So, if you want a slightly more challenging toy (and for some of your gliders, this will be NO challenge at all), here's what you need to make this toy:
Rexlace
Some Beads
And a Packet of these Ball and Cup party favors:
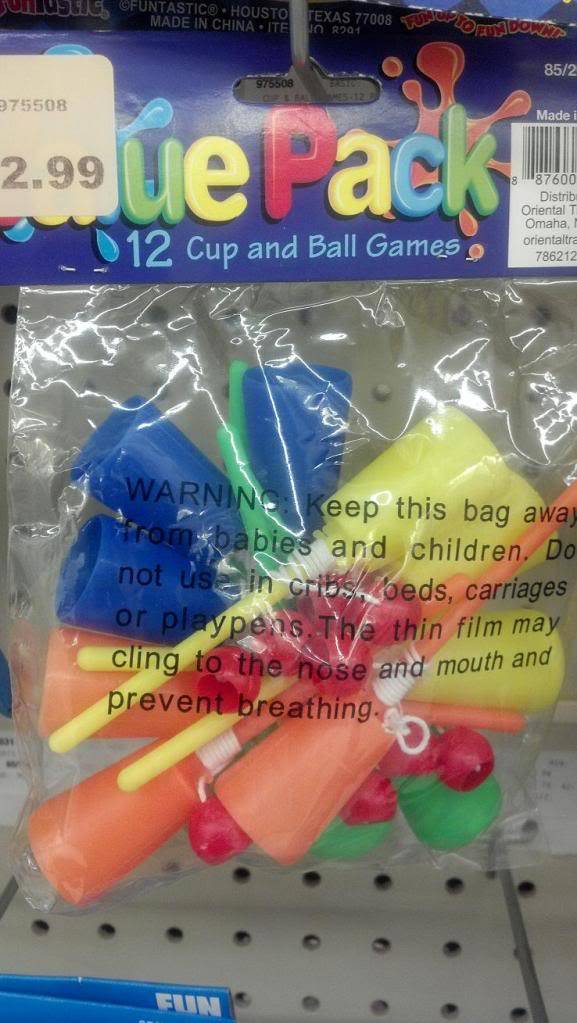
I found mine at Hobby Lobby. You might be able to find them at Party City, don't forget to check Target, or WalMart, and on occasion, you can get lucky and find them at the Dollar Store!
YOU DO NOT NEED A DRILL FOR THIS!
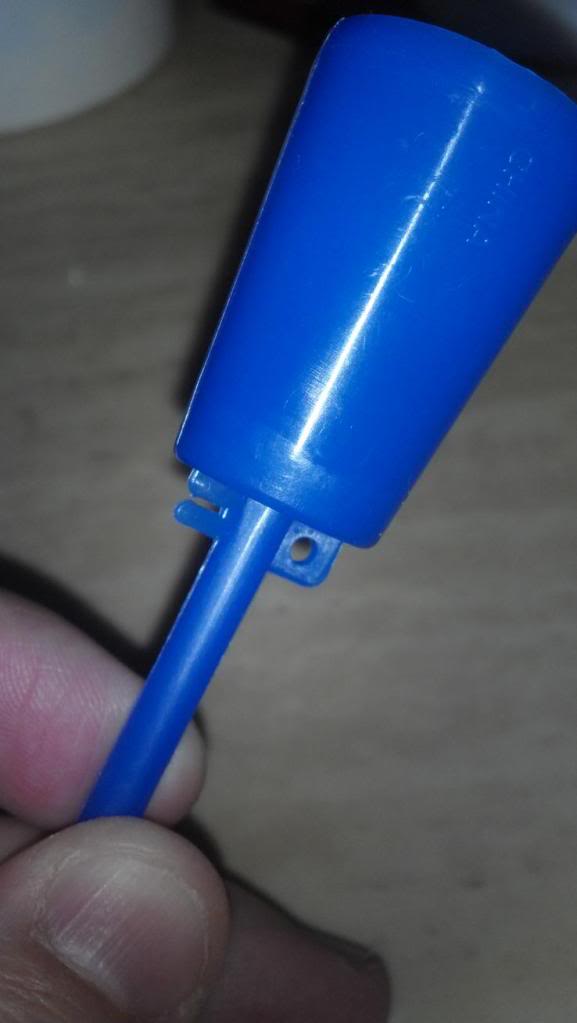
First of all, remove the string and red "ball". Discard. (Or keep the ball for another toy. You can string that up with beads, if you want.)
See this cup?
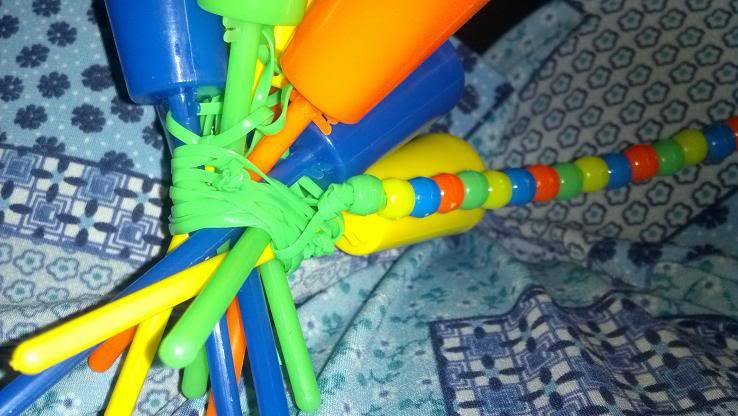
Run the Rexlace through the hole and...
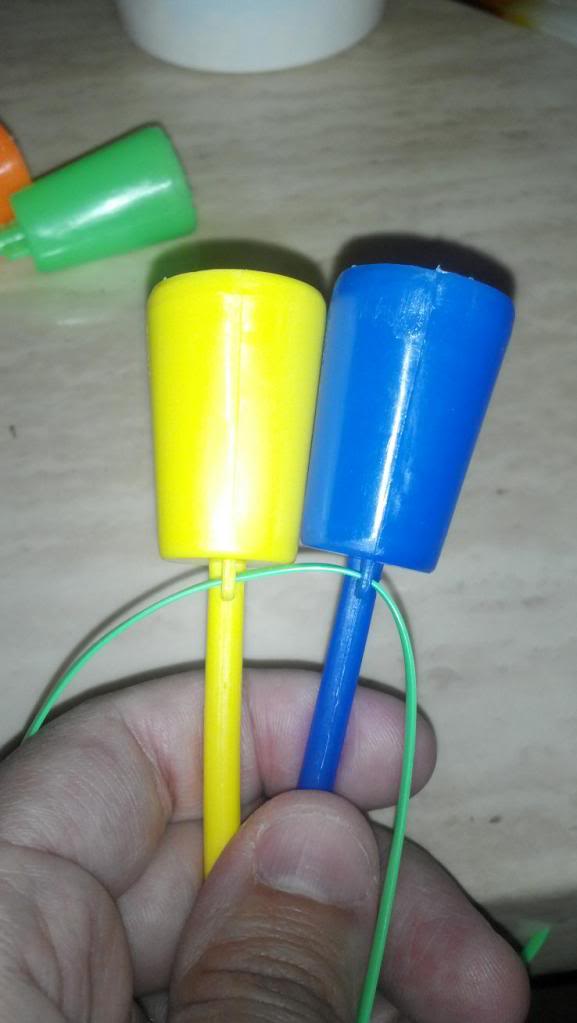
...add another.
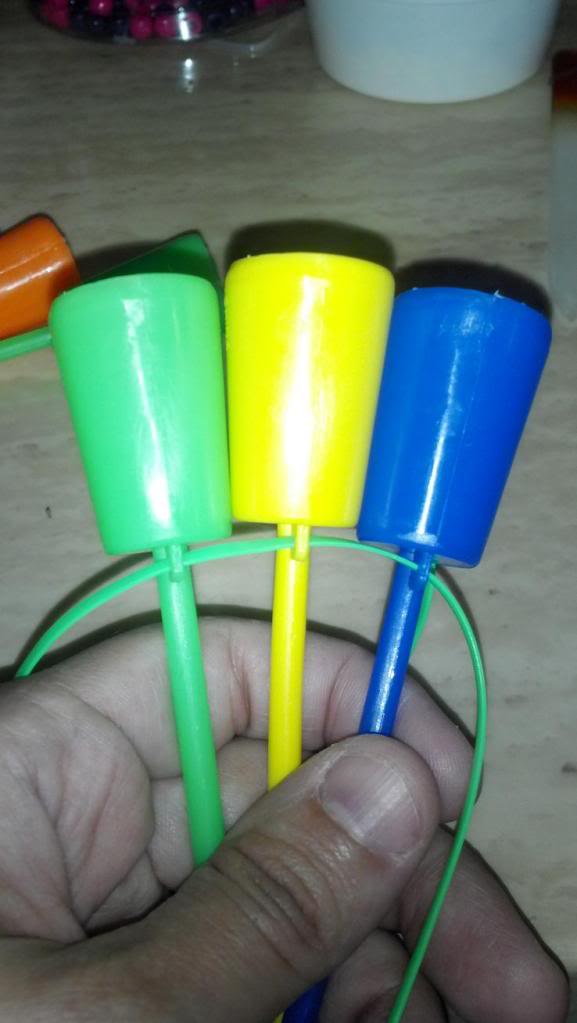
And another until you get this:

If you like the way it's laid out, in other words, if you're like me and you don't want any two of the same colors touching...
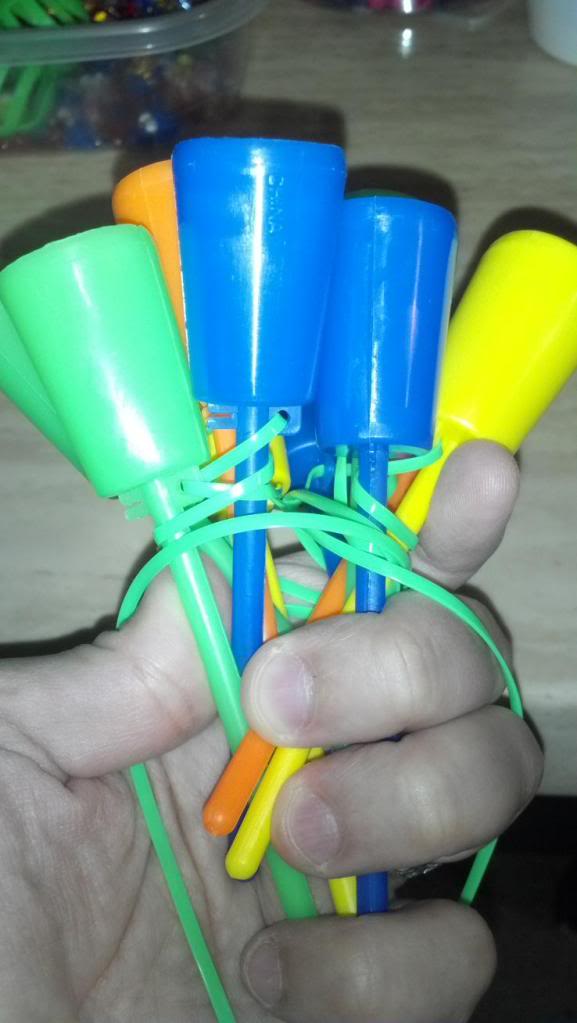
...tie it down and knot it. NOTE: you will definitely want to allow for plenty of Rexlace on EITHER side of the "bouquet". This is not unlike tying a flower arrangement for those weddings you might have had to help out with. Only there are plastic cups instead of flowers and you're using Rexlace and not floral tape.
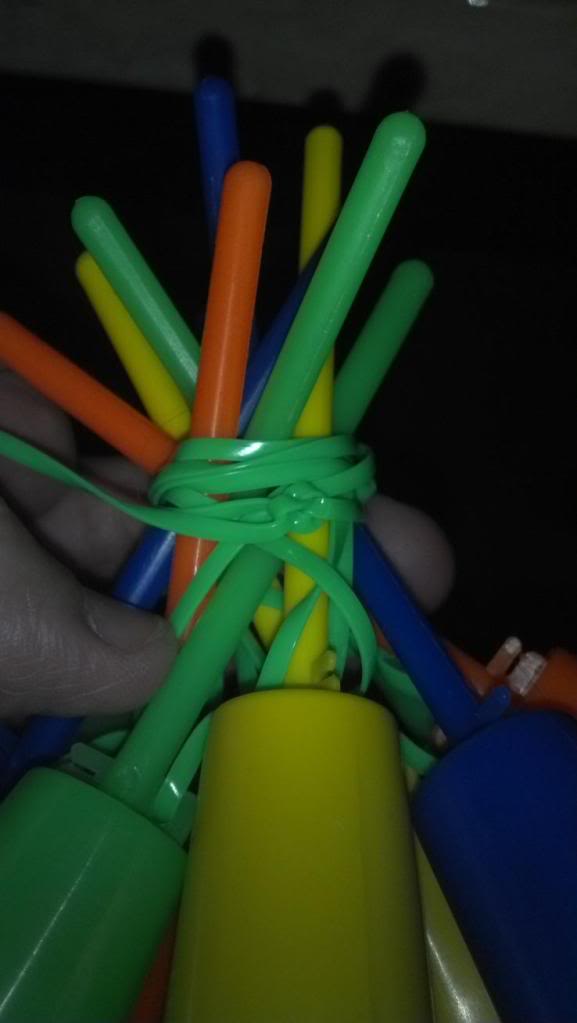
Do the same on the opposite side.

Now using wire cutters/snips OR scissors if prefer, cut but leave plenty of Rexlace to hang off.
Loop Rexlace through the "belt" of the the bouquet and attach beads. I really like matching my beads to the cup but really, anything that makes you happy is fine. Notice how the Rexlace is doubled up. I would not use a single Rexlace beading for this as this is what keeps the bouquet together. And from my experience, only Pony beads are wide enough to allow a double strand of Rexlace through. But if other beads will allow for the lacing, go for it!

At the end of each single Rexlace, attach a "clover" bead, and knot it.
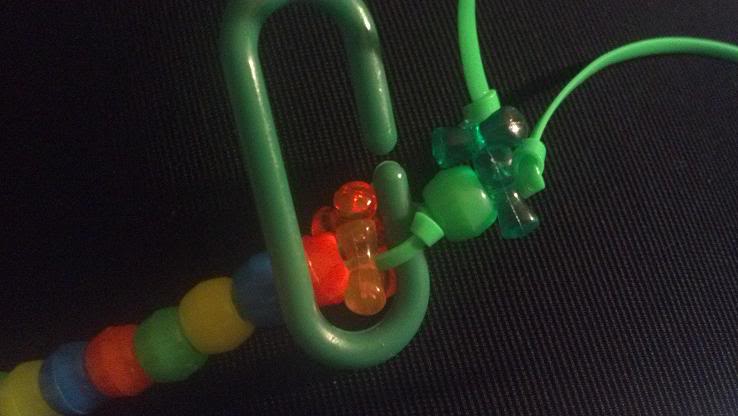
Here you can either add another knot, pony bead and two more clover beads and knot after the clover beads, then attach the C link OR
You can attach the C link, add a knot, pony bead, two more clover beads, then knot at the end of each clover bead.
Whichever is easiest for you to do manually, do that.
Repeat at least 4 times.
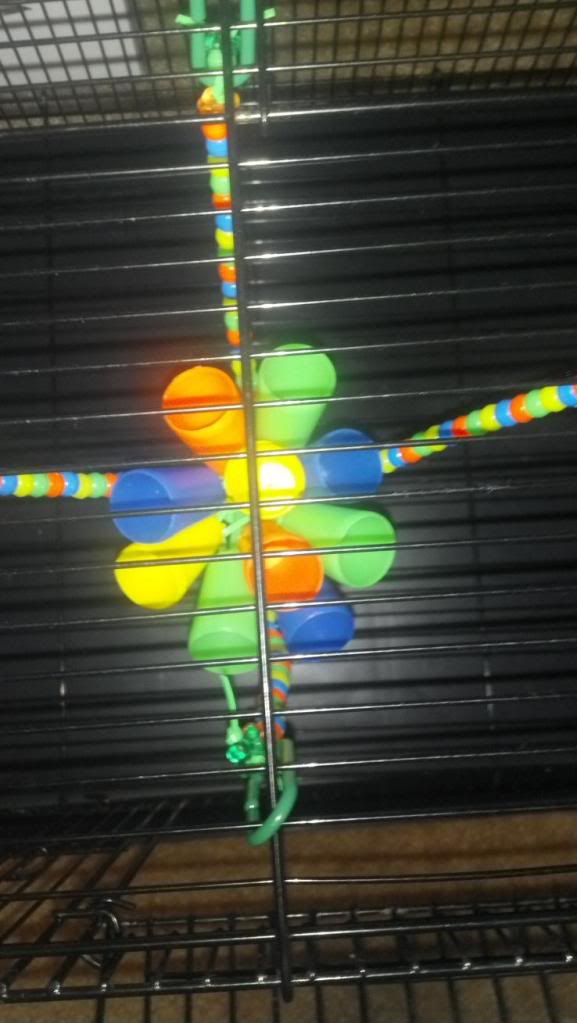
You could potentially do 8 if you wish to add more security to this toy, so it doesn't tip...but then that would make it an easier toy for them.
Anyway, I hope you enjoyed this tutorial. Have fun!
| |
|
viciousencounters
Moderator

Posts : 245
Join date : 2012-04-13
Location : New Mexico
| | Subject: Re: Toy Tutorial - Flower Blossom Thu Aug 09, 2012 6:21 pm | |
| | |
|


